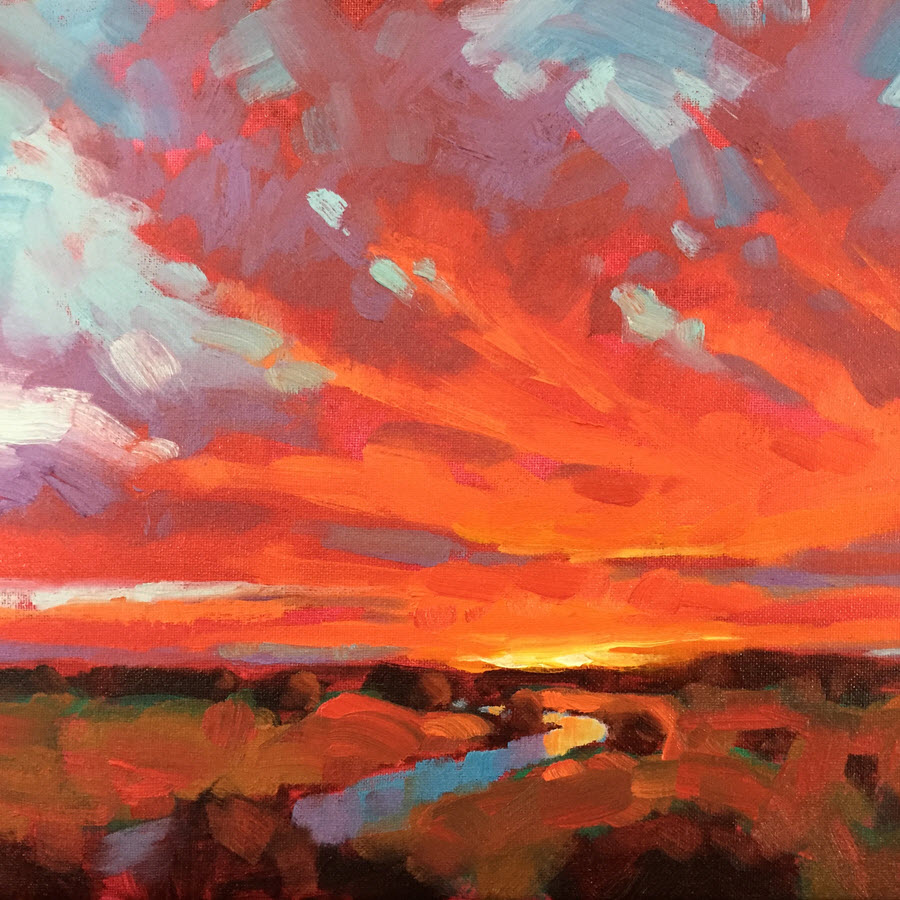
 Learn how to use value and color effectively to convey a sunset sky. Beautiful sunsets and sunrises are a favorite subject. We want to be able to paint them but they can be tricky and come across as trite if we aren’t careful. When it comes to clouds, nobody is going to be able to look at your piece and say “clouds don’t look like that”, because there are infinite possibilities when it comes to the shapes! We are really free to get very dynamic and gestural. This lesson will focus on how to achieve the drama of a sunset sky by orchestrating the value and colors.
This is a two-part lesson. First a Follow-Along Demo. Follow along at your own pace but remember my suggestions for time limits!
Next is an Independent Assignment meant to expand on some of the principles presented in the Follow-Along Demo and to personalize your work. When you have completed both parts you can upload one or both images to receive a personal video critique on your work. Remember that the more mileage you get, the more progress you make, so I recommend that you complete both parts before submitting your images.
This Lesson Includes:
- Step-by-step instruction
- Mixing basics
- Blocking in a simple composition
- Dealing with reflections
- Painting a gradation in the sky
- Brushwork practices
Paint Colors:
Co-Primaries Palette
- Lemon Yellow
- Cadmium Yellow Medium
- Naples Yellow
- Cadmium Red Light
- Alizarin Crimson
- Permanent Rose
- Ultramarine Blue
- Phathlo Blue
- Phathlo Green
- Yellow Ochre
- Burnt Umber
- Raw Siena
- Titanium White
- Ivory Black
Surface: 8 x 10 Canvas Panel
Equipment Essentials
- Gamsol + Container
- #6 or larger Filbert Brush
- #6 or larger Flat Brush
- #3 round brush
- Palette Knife
- Paper Towels or Rags
- Palette
Extras
- Bright Brush
- Single Edged Razor
- Baby Oil
- Rubbing Alcohol
- Turpenoid Natural
- Brush Cleaner
Part I
Follow-Along Demo
Before You Start, a Few Tips on Following Along
- Stop the video whenever you need to – it’s one of the great things about learning this way. Plus, you don’t need to take notes!
- Don’t feel funny about copying my pieces! It’s a time-honored way to learn and I know you’ll develop your own “style” in due course. I give you lots of ways to take off on your own and expand on the demos/lessons.
- Take your time, but not really! I want you to speed up a bit so you can start to develop the “whole” piece all at once.
- Do it differently. If it feels uncomfortable, you’re likely on the right track.
- Remember the three “P’s” Perfection, Procrastination, Paralysis. There is no such thing as a perfect painting, so don’t even worry about it.
- If you have trouble, ask for help! My team and I want you to have a great experience doing the lessons!!
- Each lesson is broken up in steps. Take a short break after each step to access your work. This is a good habit to get into.
Part 2
Independent Assignment
Painting dramatic skies is such a joyful part of painting, so you’ll want to do it again! Try another piece using my reference or go on a photo taking journey of your own!
When You’ve Completed Both Part 1 & 2
When you’re done, click here to upload pics of your painting and I’ll send you a Personal Video Critique. I’m curious what you’ll come up with! The first critique request is a free bonus for you. If you’d like additional critiques, normally a Personal Video Critique is $97 but you can send a message my support team to get a discounted critiques package – I’ve already told them that since you are taking lessons from me, you get at least 40% off.
If you aren’t ready for a personal critique from me, then be sure to upload your work to our Community page where your peers can take a look. I often comment on the Community submissions as well – it won’t be a video critique but I really enjoy seeing your work and helping you when I can.
Next Up!
When you’re done, send me your image or images and I’ll reply with a video critique of your efforts! Just follow the simple directions on the site. I’m curious what you’ll come up with!
The Stages (applies to both part 1 & 2)
- Planning
- Crop your reference, (feel free to crop it just like mine or change it up a bit).
- Do a quick 5 to 10 minute thumbnail. This is a great way to get a feel for the piece and visualize the final version.
- Drawing
- Scale up your thumbnail to the correct proportion Watch my video on scaling a sketch!
- Lightly sketch in the essential shapes
- Use your thumbnail sketch more than your photo reference at this point
- Blocking In
- Establish the essential shapes of the piece, (3 to 5 largest shapes) Use the sides of the sticks)
- Establish the values of those main shapes. What is the overall or average value of each shape?
- Get a feel for how the piece works as a whole.
- Adding On
- Add a variety of hues, and intensity to each shape.
- Add texture and smooth out gradations where needed. Watch my video To Blend or Not to Blend.
- Add a light source or direction of light.
- Add detail.
- Finishing
- Resolve any areas that need attention or TLC.
- Slow down make color adjustments where needed.
- Go the extra mile and exaggerate contrast and intensity where needed. Give yourself permission to do this!
Enjoy “Sunset Skies”!
Ctrl-Click (MAC) and choose “Save File As”
Right Click (PC) to download files.
Ctrl-Click (MAC) and choose “Save File As”
Right Click (PC) to download files.